Configuring JWT Authentication
Tribefire supports JWT authentication, which is configured via Cortex Configuration in Control Center, as explained on this page. You can either add a JWT key to read incoming tokens or configure Okta authorization service.
On this page
Configuration
-
Log in to Tribefire and open Control Center.
-
Carry out the following procedure:
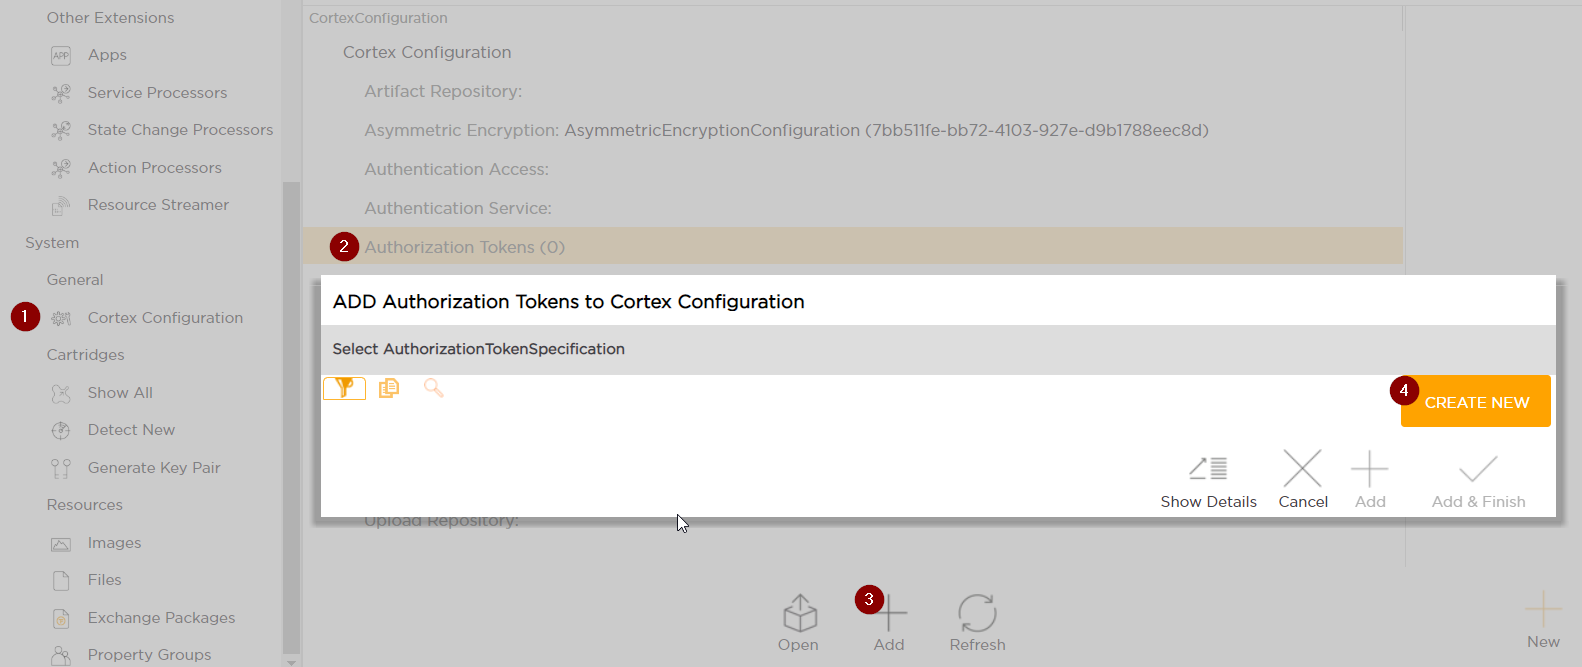
Now, you need to add a JWT Key or configure Okta Service
JWT Key
-
Select JwtAuthorizationKey from the list.
-
Set the following properties:
-
Key ID - ID referenced in the incoming token header, in the
kidproperty (tokenidin the example header below). This property is mandatory.{ "alg": "RS256", "typ": "JWT", "kid": "tokenid" } -
Roles claim - incoming token claim that contains roles (note that roles are provided as a list). In the snippet below,
tf-adminrole is in the roles claim, which must be entered in Tribefire.{ "sub": "cortex", "roles": "[tf-admin]" } -
Users claim - incoming token claim that contains users. In the snippet above,
cortexuser is in the sub claim, which must be entered in Tribefire.
-
-
Assign the key itself. You need to provide the following properties with the key:
- description - optional key description for your use.
- encodedKey - public or secret key used to verify the incoming token before accepting. Naturally, this property is mandatory. RSA key must be at least 2048 bit long.
- encodingFormat - encoding format of the key (for example
x509). This property is mandatory. - encodingStringFormat - for example
base64. This property is mandatory. - key algorithm - for example
RSA(for private-public key pair). This property is mandatory. - key size - optionally you can enter the key size here.
-
When done, commit your changes. You should now be able to send token-authorized requests!
Okta Service
Instead of adding JWT keys, you can configure Okta service to handle authorization. You need to configure the following properties:
- Audience - the audience the verifier will expect. By default:
api://default. - Connection Timeout - connection timeout in miliseconds.
- Issuer - the issuer the verifier will expect (Okta authorization server URL).
- Read Timeout - network read timeout in miliseconds.
- Roles Claim - incoming token claim that contains roles (note that roles are provided as a list).
- Username Claim - incoming token claim that contains users.
When done, commit your changes. Okta service authorization should now work.